Priya and Sam bought their first home last spring, and the pantry was a selling point: a deep, narrow closet of shelves off the kitchen. Within two months it was a disaster. Cans hid behind cans. They owned three jars of cumin and zero jars of the tomato paste every recipe seemed to need. Twice they threw out flour that had gone stale in its torn-open bag. The pantry was not small. It was just ungoverned.
A pantry does not need expensive matching containers or a professional organizer. It needs a system, built in the right order, for less than the cost of a weekly grocery run. Here is the exact sequence that works.
Step 1: Empty It Completely
Take everything out and put it on the counter. Yes, everything. You cannot organize what you cannot see, and a full empty lets you wipe the shelves, which desperately need it. As you unload, check dates and toss anything expired, stale, or mysterious. Be ruthless with the half-used bag of something nobody can identify.
Step 2: Measure and Zone
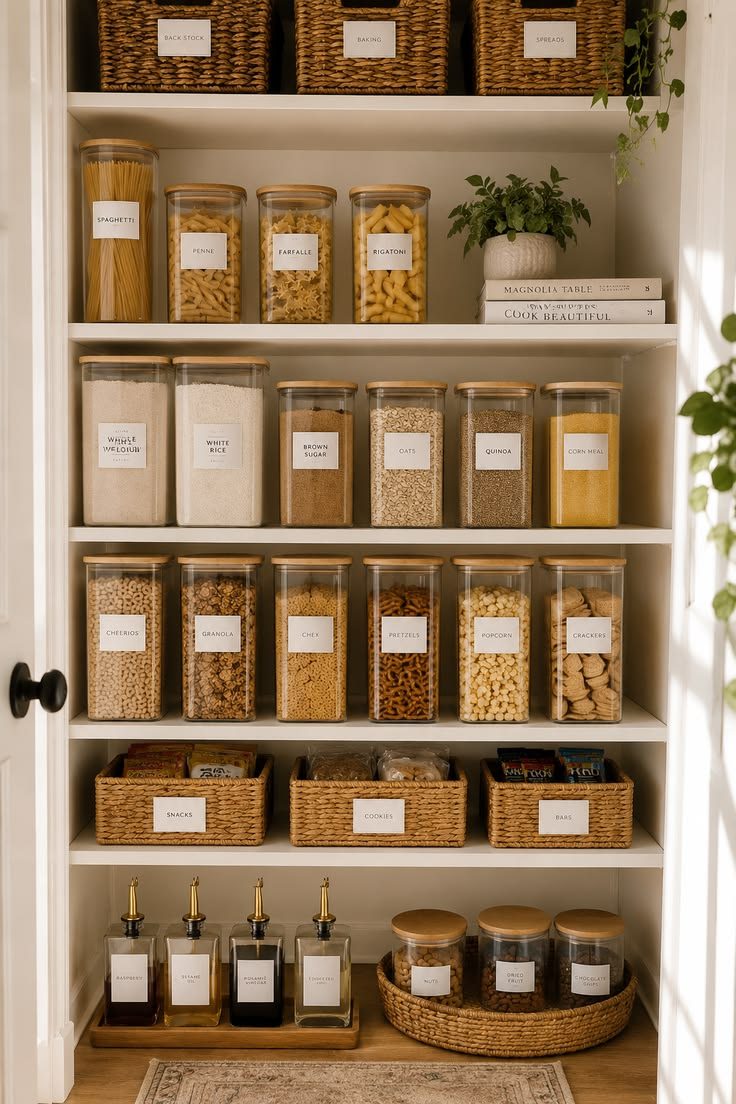
Measure shelf height, depth, and width, and note anything fixed like shelf pins. Then group what is left into zones by how you actually cook: baking together, breakfast together, snacks together, oils and vinegars together. Assign each zone a shelf based on frequency: daily items at eye level, heavy items low, rarely used items high. Zones are the whole secret. Containers without zones just become prettier chaos.
Step 3: Decant the High-Turnover Staples
Transfer flour, sugar, rice, pasta, cereal, and snacks into clear, uniform containers. Uniform shapes tessellate with no wasted gaps, and clear walls show at a glance what is running low. You do not need to decant everything; oils, canned goods, and condiments are fine in their original packaging. Start with the five staples you buy most.
Step 4: Label Everything
A label is what makes the system survive other household members. Label containers, bins, and shelf edges. Chalkboard or dry-erase labels let you rewrite when contents change. Keep the wording simple: "Rice," not "Jasmine Rice (2026 Harvest)." If a six-year-old or a guest cannot read it and act on it, rewrite it.
Step 5: Maintain With One Rule
One in, one out. When a new bag of chips enters, the old crumbs leave. Do a two-minute scan when you unpack groceries: expired items out, new items into their zones. A pantry stays organized through maintenance, not through a single heroic weekend.
Doing It on a Budget
Here is the good news: the system is the expensive part, and it is free. For containers, dollar stores and discount shops carry perfectly good bins and jars; uniformity matters more than brand. Repurpose what you have: mason jars, large pickle jars, and sturdy takeout containers all decant beautifully. Buy containers last, after you know your zones and measurements, so every purchase fits a known slot. A full pantry reset typically needs one set of uniform containers, a few bins, and labels, and nothing else.
Common Mistakes to Avoid
The biggest mistake is buying containers first, before measuring and zoning, which produces a pile of pretty jars that do not fit the shelves. The second is mismatched sizes: a jumble of container shapes wastes the very space you are trying to save. The third is decanting everything, including the condiments you use twice a year; decant the high-turnover staples and leave the rest. Finally, skipping labels guarantees the system dies within a month, because nobody else in the house knows where anything goes.
Frequently Asked Questions
Is decanting really worth the effort? For the five to eight staples you buy constantly, yes: they stay fresher, you see levels at a glance, and uniform containers pack tighter. For rarely used items, it is optional.
What is a realistic budget for a pantry reset? Most pantries need one container set, a few bins, and labels. Shopping discount stores and reusing jars you own, the whole project typically lands well under the cost of a big grocery trip.
My pantry is tiny. Will this still work? Smaller pantries benefit most, because every inch counts. Use risers and turntables to exploit vertical and deep space, and be stricter about the one-in-one-out rule.
Should I keep the original boxes for anything? Keep cooking instructions you have not memorized. Snip them out and tape them inside a cabinet door, or photograph them, then recycle the box.
Priya and Sam did the full reset on a Saturday for less than their usual grocery bill. The cumin situation is resolved at one jar. Nothing hides anymore, nothing goes stale in a torn bag, and grocery shopping takes half the time because the list practically writes itself. The pantry did not get bigger. It got a system.
Our Top Picks
ClearCan Stackable Pantry Containers 12-Pack
Uniform airtight containers in graduated sizes that turn a chaotic shelf into neat, visible rows of staples.
- Airtight seals keep flour and cereal fresh longer
- Uniform sizes stack neatly with no wasted gaps
- Lids are hand-wash recommended, which adds chore time
PantryPure Bamboo Tiered Shelf Riser
A three-tier bamboo riser that lifts back-row cans into view so nothing expires hidden behind the front row.
- Ends the buy-duplicates-because-you-cannot-see problem
- Bamboo wipes clean and looks warm, not plasticky
- Sized for standard cans; oversized jars will not fit the tiers
LabelNest Chalkboard Labels 48-Pack
Reusable chalkboard labels that stick to glass, plastic, and bins, so every container says what it holds.
- Wipe and rewrite when contents change
- Adhesive holds well but peels off without residue
- Chalk writing smudges if handled often
TurnTable Lazy Susan 2-Pack
Twin turntables that make deep shelves and corners accessible with a spin instead of an excavation.
- Reclaims dead space in deep or corner shelves
- Smooth spin even when fully loaded
- Ten-inch diameter limits it to smaller bottles and jars